About Sabih Saif

Endeavoring to influence an existence I love out of what I do. Endeavoring to become a Professional Tech Blogger | Entrepreneur | Tech Geek.

Download & Install SFT – Swift File Transfer For PC and Laptop

SFT – Swift File Transfer is a free Android tool which allows users to transfer files from one device to another wirelessly. Basically, this application uses the internet connection to share media files. This powerful app is presented to you by the well-known developers of SFT – Swift File Transfer. This transfer app becomes very helpful when you bought a new mobile and want to transfer data from previous Smartphone. SFT – Swift File Transfer is 200 hundred times faster than a Bluetooth device. So imagine how fast you can share your important files. This application is popularly used by Android users but no you can also download and install it on Windows and Mac as well.

To use it make sure that SFT – Swift File Transfer is installed on both devices. One device work as Sender and other will work as Receiver. Open the app on both devices, tap Receiver device from Sender device to connect with each other. Once done now select your media files such as videos, photos, images, live photos, 4K videos etc. Send it to the receiver. That’s it. Not just media files, in fact, you can share contacts, important documents, files and much more. The best thing about this app is that it transfer apps as well. So now you do not need data cable every time to connect mobile with PC to transfer data because users can do it wirelessly.

Also Read: Download & Install Arlo For PC (Windows 7, 8, 10 – Mac)

SFT – Swift File Transfer For PC

As I have told you that now SFT – Swift File Transfer can be used on Windows and Mac device. For that, you need to install Android Emulators on PC. Android Emulators comes with Google Play Services which allow users to run SFT – Swift File Transfer For PC. If you want to install SFT – Swift File Transfer on PC then you are at the right place because here I will tell you how you can download and install SFT – Swift File Transfer For PC both on Windows as well as Mac OS.

How to Download and Install SFT – Swift File Transfer for PC (Windows & Mac)

Follow these easy steps in order to install SFT – Swift File Transfer for PC both Windows and Mac.

  • Download an Android Emulator on your PC. There are many emulators available in the market but we recommend you Nox App Player. (Download Link for Nox App Player)
  • After downloading the .exe file of Nox. Install it on your PC by following onscreen instructions.
  • Now you will see the main homepage of Nox Emulator.
  • From Homepage click Google folder and then select Google Play Store App.
  • Enter Google ID. To signup with new ID select New. If you already have Gmail ID then select existing.
  • Once you have entered your Gmail ID. Now you will see the interface of Play Store just like Android devcie.
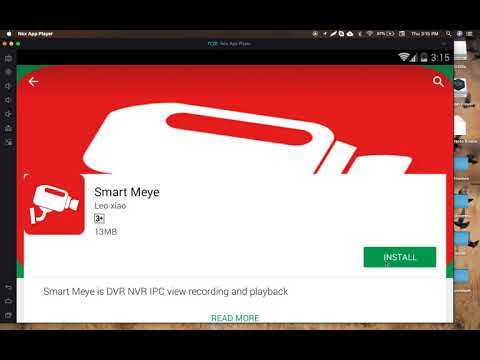
  • To install SFT – Swift File Transfer For PC. From Play Store go to search enter SFT – Swift File Transfer > click search icon > Hit Install > Confirm Install > Click Open. (You can also use SFT – Swift File Transfer on PC by going to the main homepage of the emulator)

This is how you can download and install SFT – Swift File Transfer For PC. For queries and issues use the comment section below. We reply to you as soon as possible.

Free Download Litchi for DJI Drones For PC (Windows/Mac)

Litchi for DJI Drones is one of the best Android Application. It allows Android users to connect with drones so that it records its videos. The good thing about this application is that it provides all videos of drones live on Android devcie without any distortion. Litchi for DJI Drones gives live video without any kind of hesitation. Basically, it allows users to keep the focus on a subject while flying aircraft. Not only that it also plan advanced waypoint mission and thus you will get stunning videos. This application can also be used on Windows and Mac devices with the help of Android Emulators.

The best thing about Litchi for DJI Drones For PC is that it works 100 percent same as it works on Smartphones. With this drone app, you can immerse yourself in a new world. Moreover, it detects orbit near subject with the help of the camera. Furthermore, users can zoom cam videos without pixel breaking. So, all in all, it is one of the best apps by which you can easily unlock the full potential of your DJI Mavic/Phantom/Inspire/Spark etc.

Also Download: Smart Meye For PC (Windows 7, 8, 10 – Mac)

To use this fantastic app on your Windows and Mac Syetms you need to download and install Android Emulators on PC. These emulators are available for both Mac and Windows. To install it on your PC you need to install Emulators first. Emulators come with Google Play Store and thus you will be able to download Litchi for DJI Drones For PC. Below you can see a guide by which you can install this application on your personal computers.

How to Download and Install Litchi for DJI Drones for PC (Windows & Mac)

Follow these easy steps in order to install Litchi for DJI Drones for PC both Windows and Mac.

Step1: The first thing you need to do is to download and install the BlueStacks Emulator on your PC. It is available for both Windows and Mac OS. (Download Link for BlueStacks Emulator)

Step2: After the complete downloading of the file you need to install it on your PC System as you install other software on your PC. Follow on-screen instructions in order to install BlueStacks on PC.

Step3: You will see the icon of the Emulator on the Desktop of your PC. Double Click the icon in order to Open the Emulator.

Step4: At the top, you will see an icon of search. Use this icon and enter the word Litchi for DJI Drones in it. Here you will see the results of the search.

Step5: Click on the icon of the app. It will ask you to enable the App store. Click on the continue option to enable it.

Step6: Now it asks you to enter Google Account. Here you need to enter your Gmail ID and Password in order to use Google Play Store features.

Step7: After adding your Gmail ID you will be promoted to the installation page. Here you need to click on the install button in order to get Litchi for DJI Drones for PC.

Step8: Now go to the main homepage of BlueStacks. Here at the top, you will see MY APPS option. Click on this option. Here you will see the Litchi for DJI Drones app. Click on the icon in order to use it on your PC.

That’s it. Hope the above steps help you to download and install Litchi for DJI Drones for PC on both Windows and Mac OS. If you have any issue with the article or you are facing any issue while installing it on PC then you can use the comment section below in order to let us know. We are always here for you.

SuperLive Plus for PC Download – Windows, Mac, Laptop

Today in this guide we are going to tell you how to download and install SuperLive Plus for PC running Windows and Mac Operating System. SuperLive Plus is a surveillance security app which allows users to view the live streaming of IP cams. This fantastic app manages IP cams wirelessly with the help of the internet connection. No wires and cables are needed. But to get the view the first thing you have to do is to configure the cam with the app. Cams configure with the app by entering IP address and port name. But remember one thing that internet connection must be working properly. Otherwise, you won’t be able to see live surveillance.

Talking about its features; SuperLive Plus comes with DVR and IPC functions. DVR stands for Digital Video Recorder, this feature records all the videos of the cam. All recorded videos are saved in the internal memory of the device. These saved videos can be viewed offline as well. You can play these videos anywhere or at any time you want to. IPC stands for interprocess communication, this feature help user to talk just like an intercom. But you can only communicate if IP cam includes intercom feature otherwise this feature is useless for you. Another important feature of SuperLive Plus app is that users can take screenshots while viewing live streaming and saved videos.

Sometimes SuperLive Plus troubleshoot. But the solution to resolve this problem is very easy. You have to uninstall the application and reinstall it again. That’s it. Now it will work perfectly well. So to conclude we can say that it is one such application by which you can see and check IP cam recordings from anyplace in the world as long as the Internet is accessible. It gives such a true serenity and superb incentive for cash.

How to Download SuperLive Plus for PC (Windows 7, 8, 10 – Mac)

This application installs on the PC with the help of an Android Emulator. If you want to install SuperLive Plus For PC then follow these simple steps below.

#1: Download and Install Android Emulator on PC

Android Apps and Games runs on PC only through Android Emulator. So download and install Android Emulator on your PC. (Link to download Android Emulator)

#2: To download SuperLive Plus App Setup Google Play Store and Services

After complete installation, open the emulator. From the homepage select Google Folder and then click Google Play Store. Enter your Gmail ID to active Google Services.

#3: Install SuperLive Plus For PC 

After entering your Google Account. Now you can install SuperLive Plus For PC through Play Store. (Search SuperLive Plus > Click Install > Click Open)

That’s it. Hopefully, you have downloaded SuperLive Plus App on PC. For more updates on Android Apps and Games follow the blog. Thanks

Download FREE VPN – Unseen Online for PC

Competition among Android Apps is growing day by day. Every developer wants to make their application different from others. In other words, users want applications with greater features and quality. So our team at droidspc.com are gathering the best applications for the users. Today we will tell you about an application which works as a VPN. The name of the app is FREE VPN – Unseen Online which is regularly used by the Android users. But in this guide, we will tell you more than that. We will tell you how to download and install FREE VPN – Unseen Online for PC on Windows and Mac Operating System. But first, let me tell you some functionality and features of the application.

FREE VPN – Unseen Online is a complete application which provides VPN services. It is absolutely free to download and gives unlimited bandwidth VPN services. It allows users to access websites and applications that are geo-restricted. With this app, all restrictions are removed and thus you are able to access any websites and app. Basically, it connects your device to another country IP (Proxy) and in the result, you can easily access blocked things on the internet.

Furthermore, this application also encrypts browsing data and searches. The reason behind its high security is obvious. In reality, your device is connected to the Proxy IP so it is difficult for hackers to find your actual IP. In the result, your data is more secure from hackers. The best part of Unseen Online is that it does not require any login and password. You can use it with just one tap. Just click on the connect button and that’s it. By default, this application connects the device with the best proxy. But if you want customize searches then you can select any country location. In the end, our team suggests you use this application as it gives you the best result for VPN services.

This application is available to download for free on Android devices. But here we will tell you how you can download and install FREE VPN – Unseen Online for PC. Initially, there is no way through which you can get this app on your PC but now with the help of the Android Emulators, you can easily use FREE VPN – Unseen Online on PC. If you are looking for a guide on how to download FREE VPN – Unseen Online for PC running Windows and Mac Operating System then you need to follow these steps below.

Complete Guide on How to Download & Install FREE VPN – Unseen Online for PC (Windows 7, 8, 10 – Mac)

To download and install Unseen Online For PC and to run Unseen Online on Windows Laptop and MacBook you need to download an Android Emulator.

BlueStacks
Nox App Player
Andy OS

After download, Install the emulator on your PC. Launch emulator, Search Unseen Online, Enter Google Account. Click install to begin the installation. Go to the main homepage, Click on the icon of Unseen Online in order to use Unseen Online For PC freely.

Download & Install Smart Meye For PC (Windows 7, 8, 10 – Mac)

Looking for a professional app which manages CCTV cameras and its videos? Here you will get what you are looking for. We will tell you an app which surely satisfies your needs related to the management of CCTV cams. The name of the application is Smart Meye which is available to download for free on Android devices. It becomes very helpful if you own a school, restaurant, office etc and you have installed a security cam setup. It manages and controls videos of security camera from Android Smartphone with the help of internet connection.

Smart Meye gives live streaming of the cam on Smartphone. But for that, you need to configure the cam with Smart Meye by following on-screen instructions. Other than live streaming this application also records cam videos. Saved videos are stored in the internal memory of Smartphone. Moreover, you can also store them in the cloud storage of Smart Meye.

Also See: iCSee For PC – Free Download – (Windows-Mac)

Smart Meye add and manage multiple security cams at the same time. All devices are added to the server of Smart Meye. Moreover, it also includes a feature of facial detection. This features immediately alert on Smartphone if cam detects any motion in the video. Furthermore, this application also helps take screenshots and also listen to the audio as well. These are the reason why we suggest you download this app.

This application is available to download for free on Android devices. But here we will tell you how you can download and install Smart Meye for PC. Initially, there is no way through which you can get this app on your PC but now with the help of the Android Emulators, you can easily use Smart Meye on PC. If you are looking for a guide on how to download Smart Meye for PC running Windows and Mac Operating System then you need to follow these steps below.

How to Download Smart Meye for PC, Laptop (Windows & Mac)

Follow this simple step by step tutorial to install Smart Meye for PC running Windows and Mac Operating System.

  • Download Android Emulator on your Windows or Mac devices. (Download BlueStacks)
  • Once download install it on your PC just like you install other software.
  • After installation of BlueStacks, an icon will appear on the Desktop of your PC. Double Click icon to Open BlueStacks.

(Important Note): To use Smart Meye for PC you need to enable Unknown sources on the Emulator. For this, go to “Settings -> Security -> Enable Unknown Sources”.

  • Now download Apk file of the Smart Meye. (Download Link)
  • Double-click on the downloaded file. It will automatically open through BlueStacks.
  • On the BlueStacks homepage, you will see MY APPS. Click on the option. Here you will see the Smart Meye. Click on the icon to use Smart Meye on PC.

Smart Meye on PC Video Tutorial:

That’s all. Now you can use Smart Meye for PC on both Windows and Mac OS. Follow DroidsPC for more new Apps and Games on PC. Thanks!

iCSee For PC – Free Download – (Windows-Mac)

In this guide, we will tell you how to download iCSee For PC. Basically, iCSee is a video surveillance app which allows users to watch the live streaming of CCTV camera on their Smartphone. No heavy wires and cables are required for its operations. All you need is a working WiFi connection or 3G, 4G network. iCSee provides quality services and guess what it is absolutely free to download. No fee or hidden charges are required to use the app.

To get live surveillance from CCTV cameras, you need to configure them with iCSee. For configuration, follow on-screen instructions. After configuration, you will be able to watch live video of the cam. Like other surveillance apps iCSee also includes all basic features. Other than live streaming it records videos as well. All vids are saved within the app. These videos become helpful when you have missed live streaming. Moreover, these videos can be played offline as well.

Also Download: iCSee Pro for PC – Free on Windows & Mac OS

Furthermore, iCSee app let users take screenshots and listen to the audio. View videos in both portrait and landscape mode. The motion detector is also an important feature of this app. It alerts users on Smartphones whenever it detects a motion in the cam video. So to conclude, we can say that iCSee is one of the best app which easily manage and control IP cams using internet connection.

This application is available to download for free on Android devices. But here we will tell you how you can download and install iCSee for PC. Initially, there is no way through which you can get this app on your PC but now with the help of the Android Emulators, you can easily use iCSee on PC. If you are looking for a guide on how to download iCSee for PC running Windows and Mac Operating System then you need to follow these steps below.

How to Download and Install iCSee for PC (Windows & Mac)

Follow these easy steps in order to install iCSee for PC both Windows and Mac.

  • Download an Android Emulator on your PC. There are many emulators available in the market but we recommend you Nox App Player. (Download Link for Nox App Player)
  • After downloading the .exe file of Nox. Install it on your PC by following onscreen instructions.
  • Now you will see the main homepage of Nox Emulator.
  • From Homepage click Google folder and then select Google Play Store App.
  • Enter Google ID. To signup with new ID select New. If you already have Gmail ID then select existing.
  • Once you have entered your Gmail ID. Now you will see the interface of Play Store just like Android devcie.
  • To install iCSee For PC. From Play Store go to search enter iCSee > click search icon > Hit Install > Confirm Install > Click Open. (You can also use iCSee on PC by going to the main homepage of the emulator)

You can use Rooted BlueStacks for the same purpose. This is how you can download and install iCSee For PC. For queries and issues use the comment section below. We reply to you as soon as possible.

Private Photo Vault For PC and Laptops

It is difficult to say no to close friends and family members when they ask to give mobile. While giving mobile the first thing that comes to our mind that what if they check phone gallery. Every person has his/her own personal life but some people always interfere in others personal life. To overcome this situation there is an app which hides all private picture and videos. The name of the app is Private Photo Vault. It’s a very commonly used app for Android and iOS users. In this tutorial, I will tell you how you can also use Private Photo Vault app on Windows and Mac devices. But first, let’s know about the app.

Private Photo Vault is one of the best app which provides protection for gallery content. It let you hide personal videos and pictures. All media files are saved because this app is protected through a passcode. No one can access the photo vault app except you. Click on Plus icon and select images and videos which you want to hide from others. You can select multiple images and videos as well. The best thing about Private Photo Vault is that it clear selected files from Gallery. You can also export media files back to the gallery at any time. Make folders in the app just like you make it in the gallery. So now you can give your mobile to friends and family members without having any hesitation because no one can see your personal things.

Now users can also use Private Photo Vault For PC. The good news is that Private Photo Vault For Windows and Mac works just like Android Smartphone. Now you can hide all your PC personal media files. Below you can see a guide which let you install Private Photo Vault For PC and Laptops.

How to Download & Install Private Photo Vault For PC and Laptops

To download and install Private Photo Vault For PC and to run Private Photo Vault on Windows Laptop and MacBook you need to download an Android Emulator.

BlueStacks
Nox App Player
Andy OS

After download, Install the emulator on your PC. Launch emulator, Search Private Photo Vault, Enter Google Account. Click install to begin the installation. Go to the main homepage, Click on the icon of Private Photo Vault in order to use Private Photo Vault For PC freely.

Download & Install AndFTP For PC (Windows-Mac)

AndFTP is a free Android tool which does workings related to FTP. This app manages all FTP configurations with the help of FTP file browser and device. Furthermore, this app provides users to download, synchronization, upload and share features with resume support. AndFTP can open commands and easily run custom commands. Moreover, this app also supports key such as SSH RSA/DSA.

It is popualry used by Android users and now you can also download and install AndFTP For PC on both Windows and Mac. The best thing about AndFTP For PC is that it works absolutely the same as it works on Android devcie. Now users can do all working of FTP from Windows and Mac System. So, all in all, it is one of the best application which allows users to manage FTP configuration on Android as well as Windows or Mac.

To use this application on your Personal Computer you are required to download and install Android Emulators. These android emulators are specially designed Android OS for Mac and Windows. Emulators come with pre-installed Google Play Store in it just like an Android device thus users are able to download AndFTP For PC. If you want to install AndFTP on PC then follow this simple and step by step guide below.

How to Download and Install AndFTP for PC (Windows & Mac)

Follow these easy steps in order to install AndFTP for PC both Windows and Mac.

  • Download an Android Emulator on your PC. There are many emulators available in the market but we recommend you Nox App Player. (Download Link for Nox App Player)
  • After downloading the .exe file of Nox. Install it on your PC by following onscreen instructions.
  • Now you will see the main homepage of Nox Emulator.
  • From Homepage click Google folder and then select Google Play Store App.
  • Enter Google ID. To signup with new ID select New. If you already have Gmail ID then select existing.
  • Once you have entered your Gmail ID. Now you will see the interface of Play Store just like Android devcie.
  • To install AndFTP For PC. From Play Store go to search enter AndFTP > click search icon > Hit Install > Confirm Install > Click Open. (You can also use AndFTP on PC by going to the main homepage of the emulator)

This is how you can download and install AndFTP For PC. For queries and issues use the comment section below. We reply to you as soon as possible.

WifiDroid – Wifi File Transfer for PC (Windows/Mac)

There are many applications available for Smartphone which let users transfer data wirelessly from one device to another. But I suggest WifiDroid Wifi File Transfer app. Because it comes with quality services. Users can easily share important files and documents for free. There is no need for cables and wires. The thing which WifiDroid app requires is a working internet connection. WifiDroid – Wifi File Transfer is 100 percent faster than the speed of Bluetooth. So it transfers data fastly without disconnection.

To use WifiDroid app, make sure that it is installed on both the Sender and Receiver device. Just connect devices with each other using an internet connection. Internet connection must be the same. Once done, you are now able to share important media files and documents fastly. This app, not just transfer photos and videos, in fact, it shares contacts, messages, apps and much more. WifiDroid – Wifi File Transfer becomes very helpful when you bought a new smartphone and want to transfer data immediately from the previous phone. All of your Phone’s files, documents, contacts, apps can easily be shared. Now other than Android devices you can also use it on PC devices. This app can easily be installed on both Windows as well as Mac Devices.

With WifiDroid Wifi File Transfer for PC users can share data from computer to computer, computer to Android and Android to a computer for free. In this guide, I will tell you how you can download and install WifiDroid Wifi File Transfer for PC on both Windows and Mac. If you want to use WifiDroid Wifi File Transfer on PC then follows this simple and step by step guide below.

How to Download WifiDroid – Wifi File Transfer for PC, Laptop (Windows & Mac)

Follow this simple step by step tutorial to install WifiDroid – Wifi File Transfer for PC running Windows and Mac Operating System.

  • Download Android Emulator on your Windows or Mac devices. (Download BlueStacks)
  • Once download install it on your PC just like you install other software.
  • After installation of BlueStacks, an icon will appear on the Desktop of your PC. Double Click icon to Open BlueStacks.

(Important Note): To use WifiDroid – Wifi File Transfer for PC you need to enable Unknown sources on the Emulator. For this, go to “Settings -> Security -> Enable Unknown Sources”.

  • Now download Apk file of the WifiDroid – Wifi File Transfer. (Download Link)
  • Double-click on the downloaded file. It will automatically open through BlueStacks.
  • On the BlueStacks homepage, you will see MY APPS. Click on the option. Here you will see the WifiDroid – Wifi File Transfer. Click on the icon to use WifiDroid – Wifi File Transfer on PC.

That’s all. Now you can use WifiDroid – Wifi File Transfer for PC on both Windows and Mac OS. Follow DroidsPC for more new Apps and Games on PC. Thanks!

How to Download BlueSafari Browser For PC, Laptop (Windows – Mac)

If you are bored of using the default browser of Smartphone then try BlueSafari Browser. This browser app is good as compared to other browser apps because it show results fast. Yes with its cookie feature users can access web pages fastly and securely. The first time this app might take some time while loading a web page. But after that, you can access web pages very fastly. The reason behind this is that it’s already recorded in the browser’s history. Moreover, with its customization options, users can install add-ons which enhance the performance of the web browser and works smoothly. Furthermore, it also includes ad block extension. Now users can block ads to display. All annoying ads are hidden through this extension.

BlueSafari Browser can also be installed on Windows and Mac Devices. Yes with the help of Android Emulators users can easily get BlueSafari Browser For PC and Laptop. The good news is that this application works on Computer just like an Android device. This application BlueSafari Browser has been removed from Android Google Play Store. But users can still install it on their Android Smartphones with the help of APK file. This APK file also allows Windows and Mac users to use this app.

To use BlueSafari Browser For PC you are required to install Android Emulators. Basically, Android Emulators are third-party Windows and Mac software which allow you to play/run Android Apps on PC. If you want to install BlueSafari Browser For PC through Android Emulator then follow this guide below.

How to Download & Install BlueSafari Browser for PC (Windows & Mac)

Follow these easy steps in order to install BlueSafari Browser for PC both Windows and Mac.

Step1: The first thing you need to do is to download and install the BlueStacks Emulator on your PC. It is available for both Windows and Mac OS. (Download Link for BlueStacks Emulator)

Step2: After the complete downloading of the file you need to install it on your PC System as you install other software on your PC. Follow on-screen instructions in order to install BlueStacks on PC.

Step3: You will see the icon of the Emulator on the Desktop of your PC. Double Click the icon in order to Open the Emulator.

Note: (Before we move towards downloading process of BlueSafari Browser for PC make sure that you have enabled the Unknown sources on Android Emulator. For this, go to the (Settings -> Security -> Enable Unknown Sources).

Step4: Now download Apk of BlueSafari Browser. (Download Link)

Step5: Once downloaded, double-click on the file. It will automatically open through BlueStacks.

Step6: Now at the main homepage of BlueStacks you will see MY APPS option. Click on this option. Here you will see the BlueSafari Browser application. Click on the icon in order to use it on your PC.

That’s it. Hope the above steps help you to download and install BlueSafari Browser for PC on both Windows and Mac OS. If you have any issue with the article or you are facing any issue while installing it then you can use the comment section below in order to let us know. We are always here for you.

Also Download: Samsung Internet Browser Beta For PC (Windows-Mac)